At the March 2026 ACB Monthly meeting I presented a couple of my bottles of a Smoked Porter for tasting. Rather than use commercially smoked malt, I smoked my own malt. I’ve done this on several occasions in the past and thought I’d document how easy it is to do.
Be aware that here I am talking about COLD SMOKING. This is smoking in a cold environment where the subject of the smoking (i.e. our malted barley) is not subjected to any form of heat. This is different from many BBQ HOT SMOKING activities where meats are in an enclosed hot environment directly over burning wood, where they may encounter temperatures into 3 figures…effectively cooking the meat whilst it is being smoked. We do not aspire to cooking our base malt in any form…after all, we don’t wish to kill off the enzymes in the malt that are responsible for starch conversion.
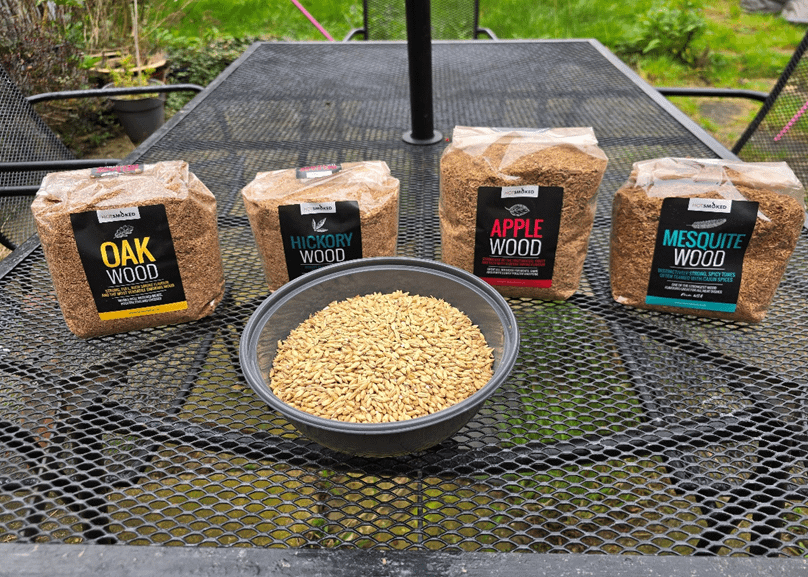
One of the advantages of smoking your own malt is that you have access to a variety of different woods that can impart different flavours and you are not just restricted to the common (Beechwood, Oak) smoked malts that homebrew suppliers can provide. A selection of wood dust is shown in the image below along with the 500g of Pauls Lager Malt, which I plan to smoke for a Hickory Smoked Helles I will be brewing in a few weeks’ time.
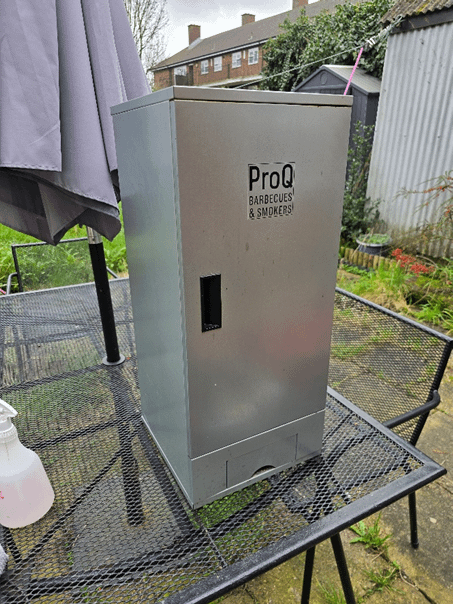
You obviously need some sort of cabinet/enclosure into which you can place your malt and smoking wood. I use the ProQ smoking cabinet pictured below. It’s a simple thin metal box with shelves onto which you can place trays on which you place your food or whatever it is you wish to smoke.
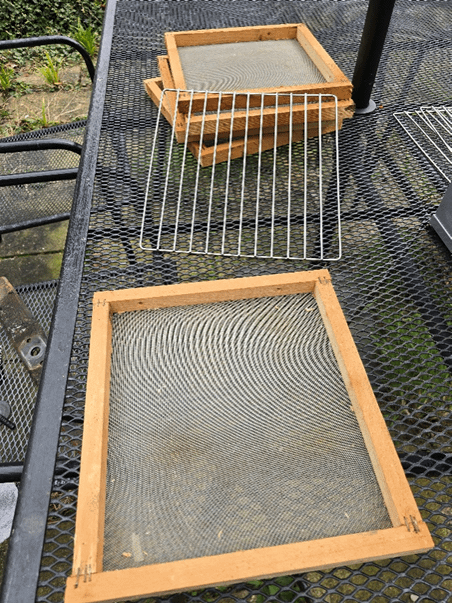
The cabinet comes with a number of wire shelves but whilst these are fine to put a lump of cheese on, or hang a sausage from, they are no good to smoke malted barley kernels. So…I knocked up a few wire mesh trays of my own using some spare wood I had lying around, and some wire mesh purchased online. Each tray is around half an inch deep and will hold approximately 450g of malt…you don’t really want to go any deeper than half an inch otherwise you will find yourself having to turn the malt regularly in order to get it exposed to the smoke.
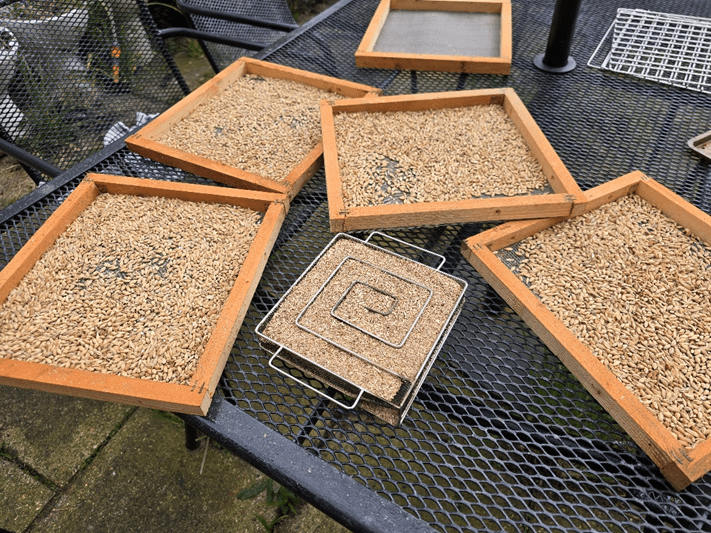
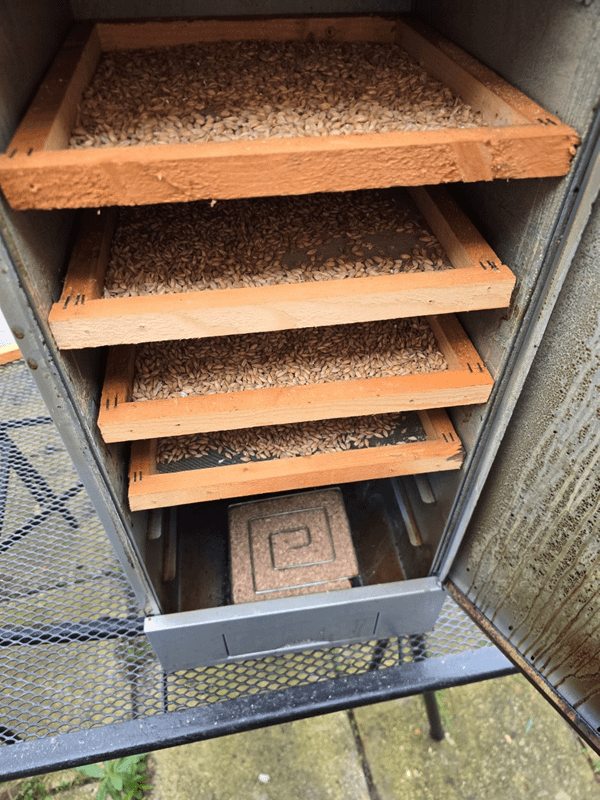
Next up you will require something to burn the wood dust in. Spiral wood burners come in a variety of shapes, but most are square and, when filled with wood dust allow a controlled “burn” over several hours. The spiral maze-like layout and the mesh walls between the spirals ensures that the wood burns slowly in a controlled manner, rather than just in one great pyre. You do have to exercise a little bit of caution so as not to overfill the smoking tray above the wire walls, as this will allow “fire” to jump across the spirals, rather than be directed round the “maze”. In the image below you can see the spiral smoker, along with four trays of malt which has been very thinly spread…. the ProQ cabinet can take up to 7 shelves if necessary.
So…you’ve got the wood dust all loaded, all you need to do is to place the shelves in the cabinet, set the wood dust alight and place the smoking tray in the bottom of the cabinet. The initial “start” of the smoker (bottom right corner in the picture above) is sloped, to allow you to place a “tea-light” underneath to start the burn. Now my opinion is that cavemen did not discover fire in order that their wives could mess about with tea lights…so I just use a gas torch to get the wood smouldering…but you can use whatever version of fire you like. All loaded up inside your cabinet things should look a bit like this…note there is a small slot at the bottom of the cabinet which you can load your smoking tray through.
A couple of points about I will call “smoke management”…Because the trays that I have built fit snugly into the cabinet, if I was smoking a lot of malt, with fully laden trays, it would hinder circulation of the smoke within the cabinet. For this reason, over the course of the smoking I have gotten into the habit of regularly rotating the shelves position. When the trays are filled to the full half inch depth, I will also regularly empty them all out into a bucket, give them a good mix up and refill the trays to try to ensure even smoking.
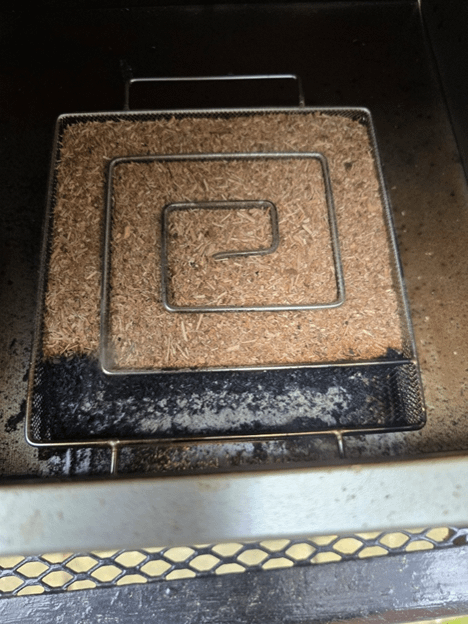
Eventually, after burning a while you will see the burn going round the smoking tray in a spiral. The example below shows it having just turned the first corner. My experience is that the wood in the spiral smoker will burn for between 9 to 11 hours…it does though depend on the wood itself, as different varieties have different particle sizes and burn at different rates.
I generally find that this duration imparts a good level of smoke character to the malt, but if you want more smoke effect, there is nothing to stop you smoking for a second time. Once smoking is complete, just consign the malt to an airtight container until the time comes to use it. People will say that you cant smoke crushed malt…I will dispute this and say that I have smoked both pre-crushed and un-crushed malt without issue or negative impact on beer flavour.
In terms of the equipment shown above, you can buy it from the following places…
The Pro Q smoking cabinet is available from Amazon at around £110, likewise the spiral smoker can be had from Amazon for £35, eBay for around £25.
However…a large tall cardboard box ( the Pro Q cabinet is 32x32x70cm) with something like knitting needles or wooden dowelling stuck through it (to create beams for shelves to rest on) will work just as well….you just need a ceramic tile, paving slab or similar to place the spiral smoker on in the bottom of the box and maybe a house brick to put on top of the box in case it is a bit breezy….obviously the fire risk is enhanced and anyone who adopts a cardboard box as a smoking cabinet does so at their own risk.
The wood dust can be had from a variety of places but I get mine from Hot Smoked | Specialists in hot and cold food smoking equipment who also sell the ProQ cabinet for £20 more than Amazon.
Wire mesh to build your own trays can be cheaply had from a variety of suppliers…I’ve used Buy wire mesh and chicken wire online at The Mesh Company in the past without issue.
In short, cold smoking is really simple, doesn’t really require a huge investment (the spiral smoking tray is really the only absolutely necessary thing in order to control the “burn”) and offers a lot of scope for experimentation…not just with brewing malt but also cheese, ham, fish, chillies etc. etc. You don’t really need to build trays as I have done…many DIY stores sell pre formed punched/slotted metal sheets which are rigid enough to act as a tray and I’m sure many cookery websites would have something similar that could be utilized.
It shouldn’t need saying but, just in case, smoking is not an indoor activity…do it in a well-ventilated outdoor environment…not even in your garage, unless you want the lingering smell of smoke over all your tools or brewing equipment. I am not responsible for any domestic disputes arising as a result of folks smoking their own malt.
Nick Davis
I use a eco I smoker which is a cardboard box inside another cardboard box. Push corners of inner box in at intervals to create shelf supports. Cheap and effective. Just put metal tray on bottom to rest the smoking spiral on. It works great and has never caught fire.